Typo3 Chat Installation Instructions
Before you proceed with the chat installation, we suggest you sign up for an account with us first. It’s absolutely free, and you’ll need access to certain details inside in order to complete the process.
-
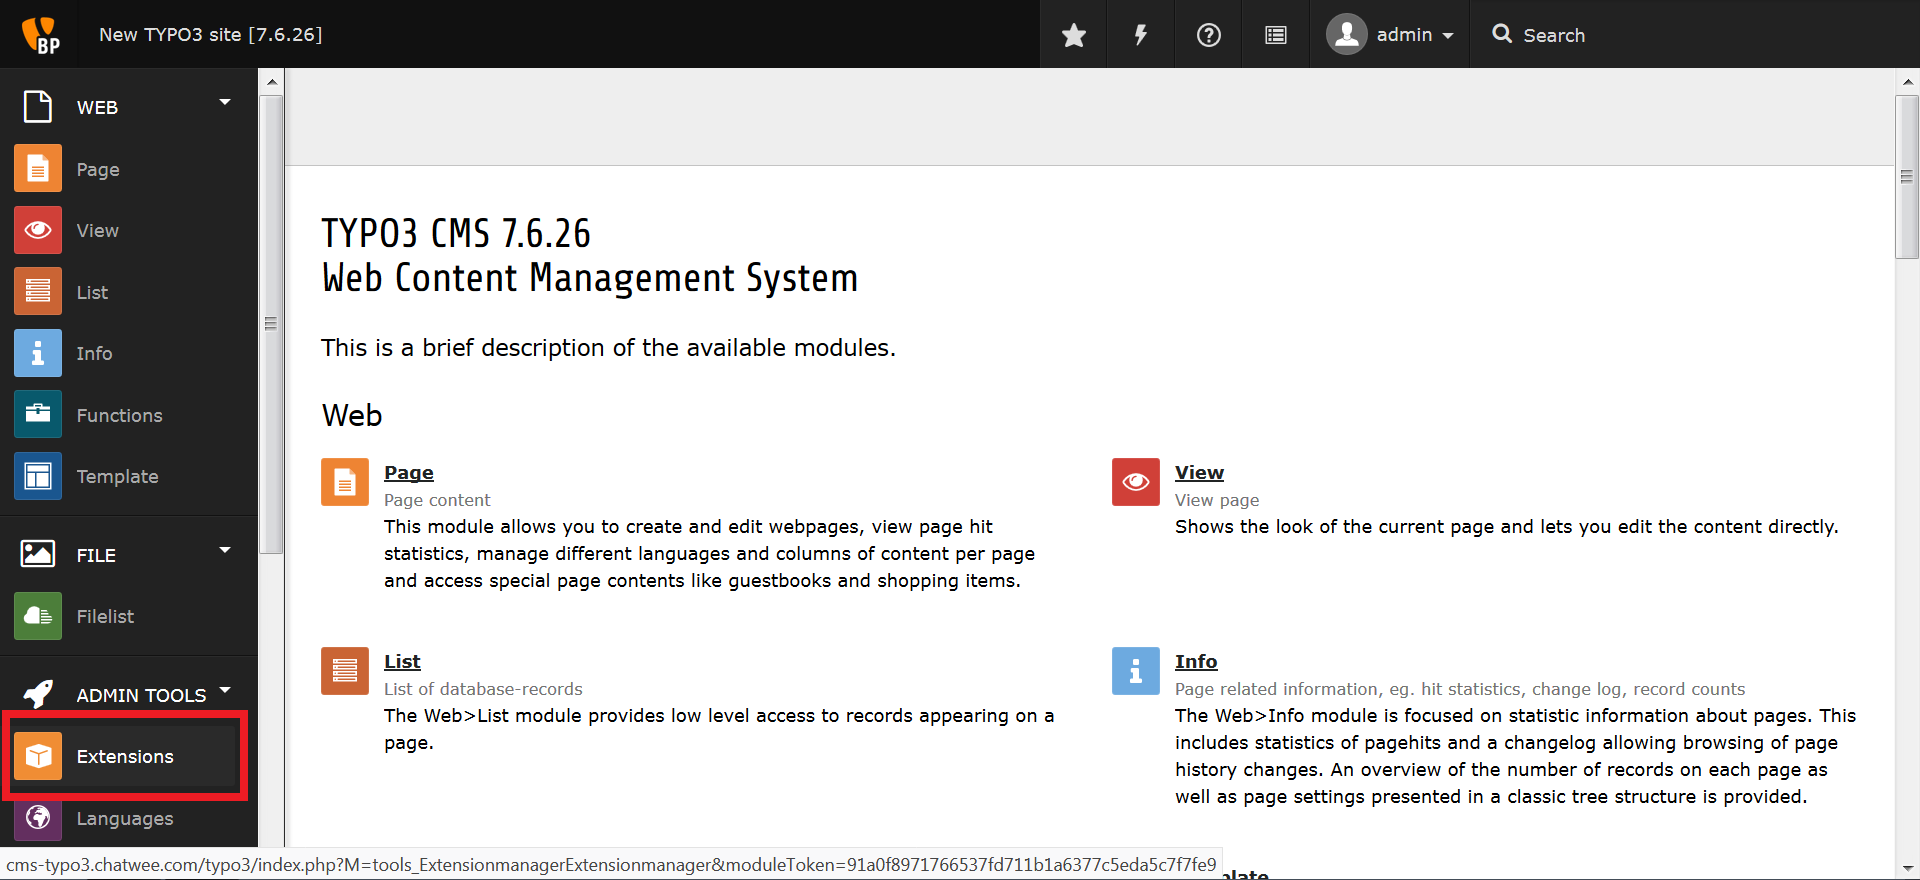
Log in to your Typo3 admin panel and click Extensions in the left hand column.
-
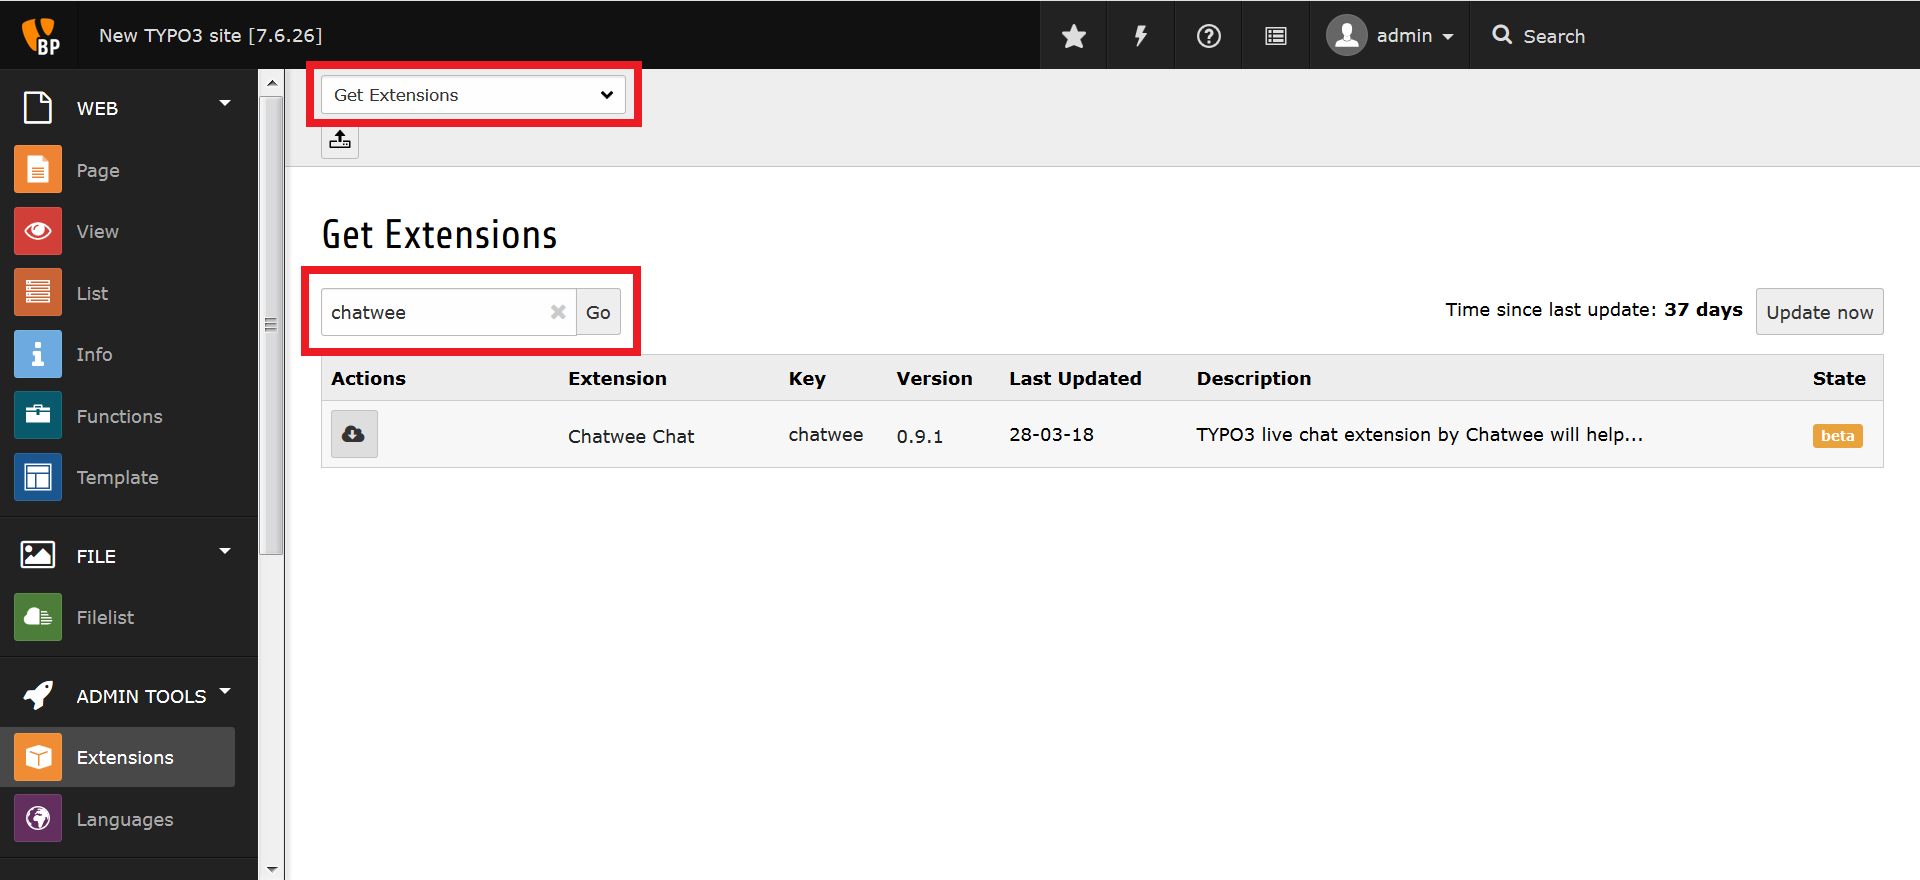
Next, switch to Get Extensions in the dropdown menu up top and search for Chatwee.
-
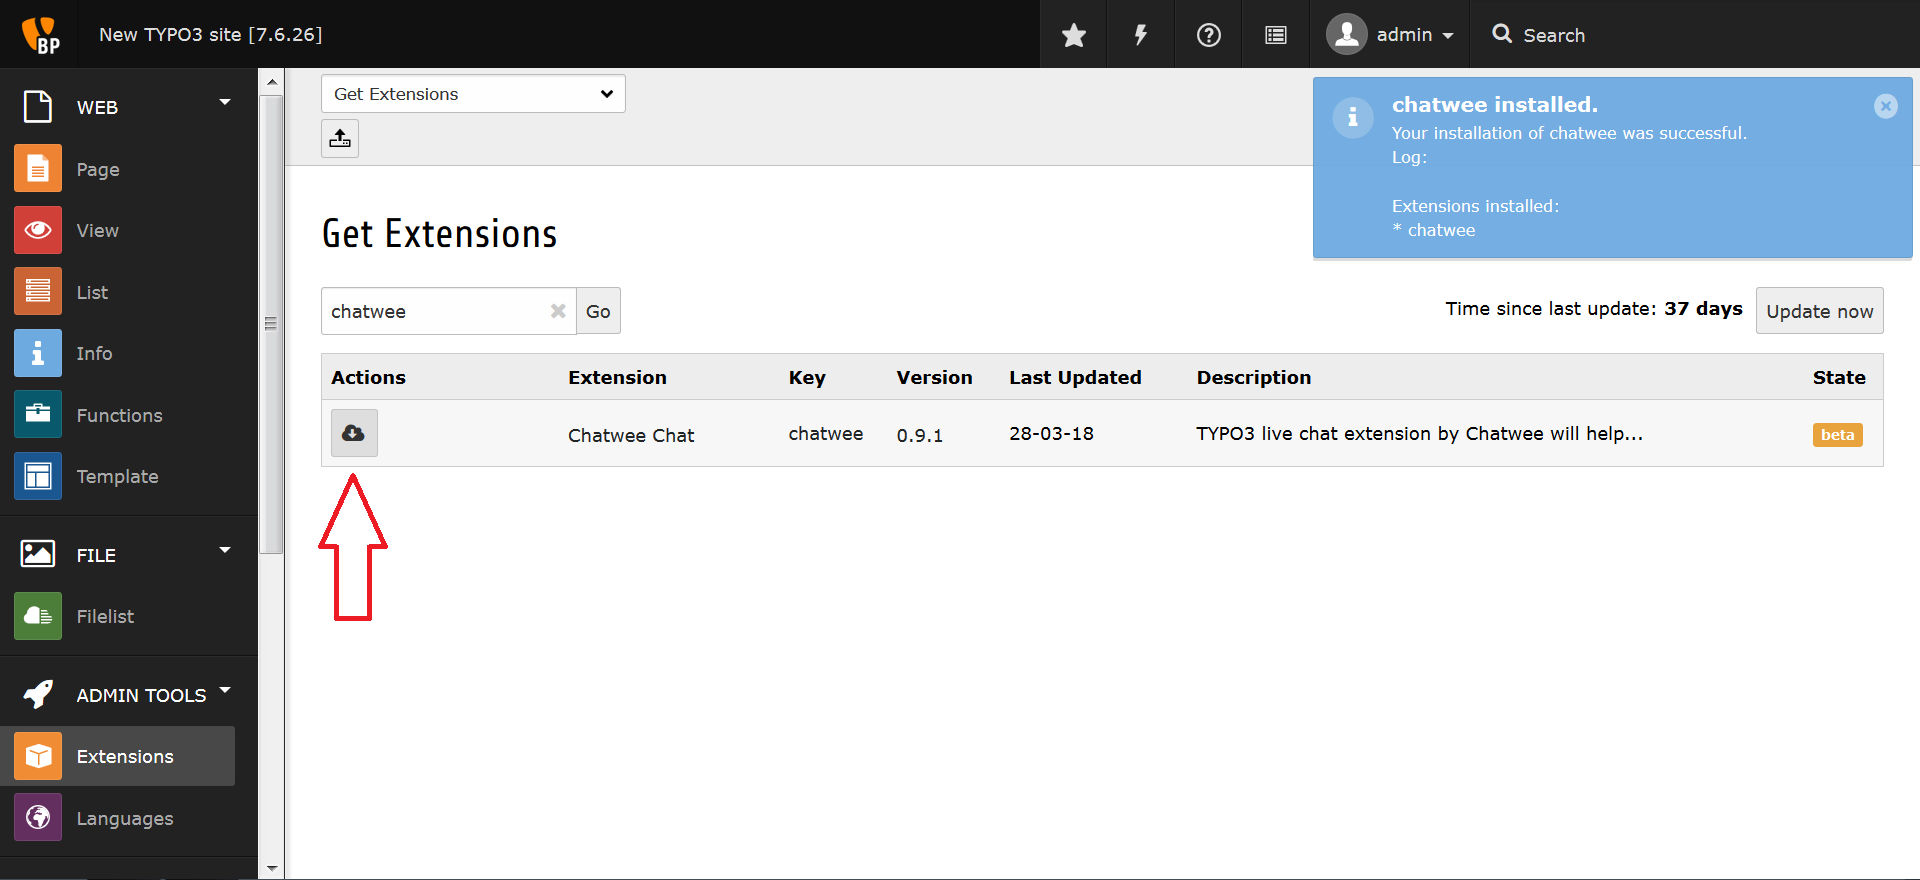
Proceed by clicking the Import and Install button to install the chat extension.
-
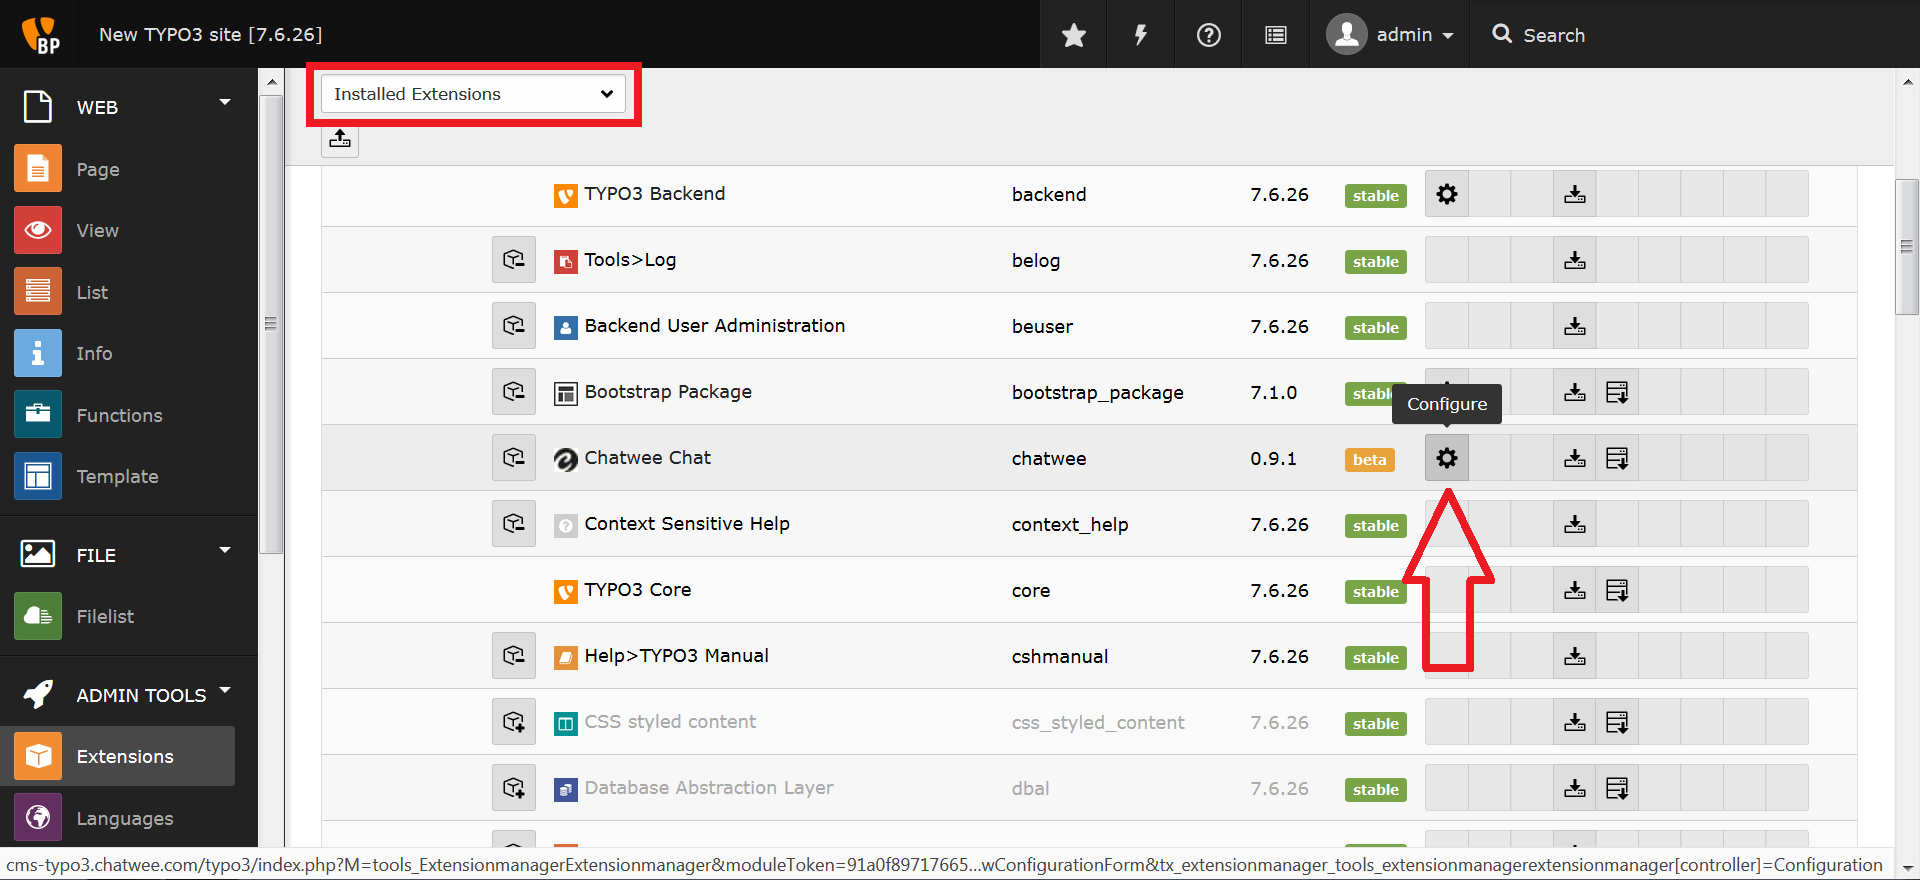
Then, switch back to Installed Extensions and click the Configure button.
-
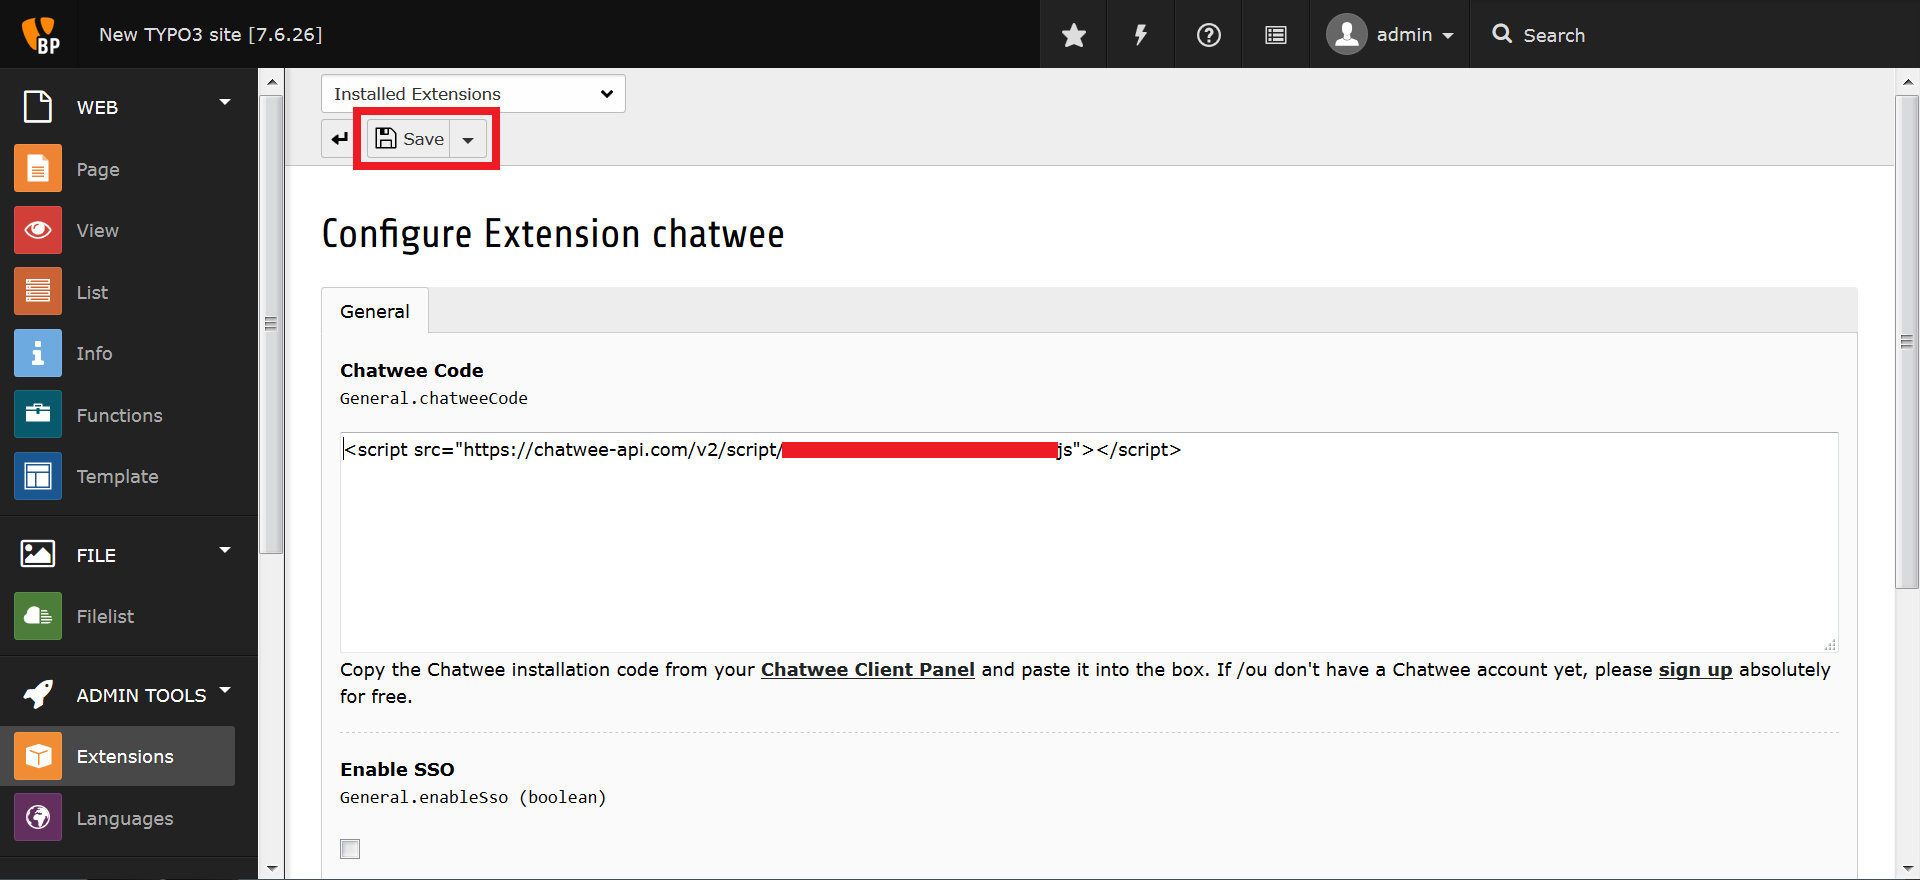
Finish off the process by pasting in the installation code you’ll find in your Chatwee Dashboard and adjusting other settings, should the need be. Click Save once you’re done.
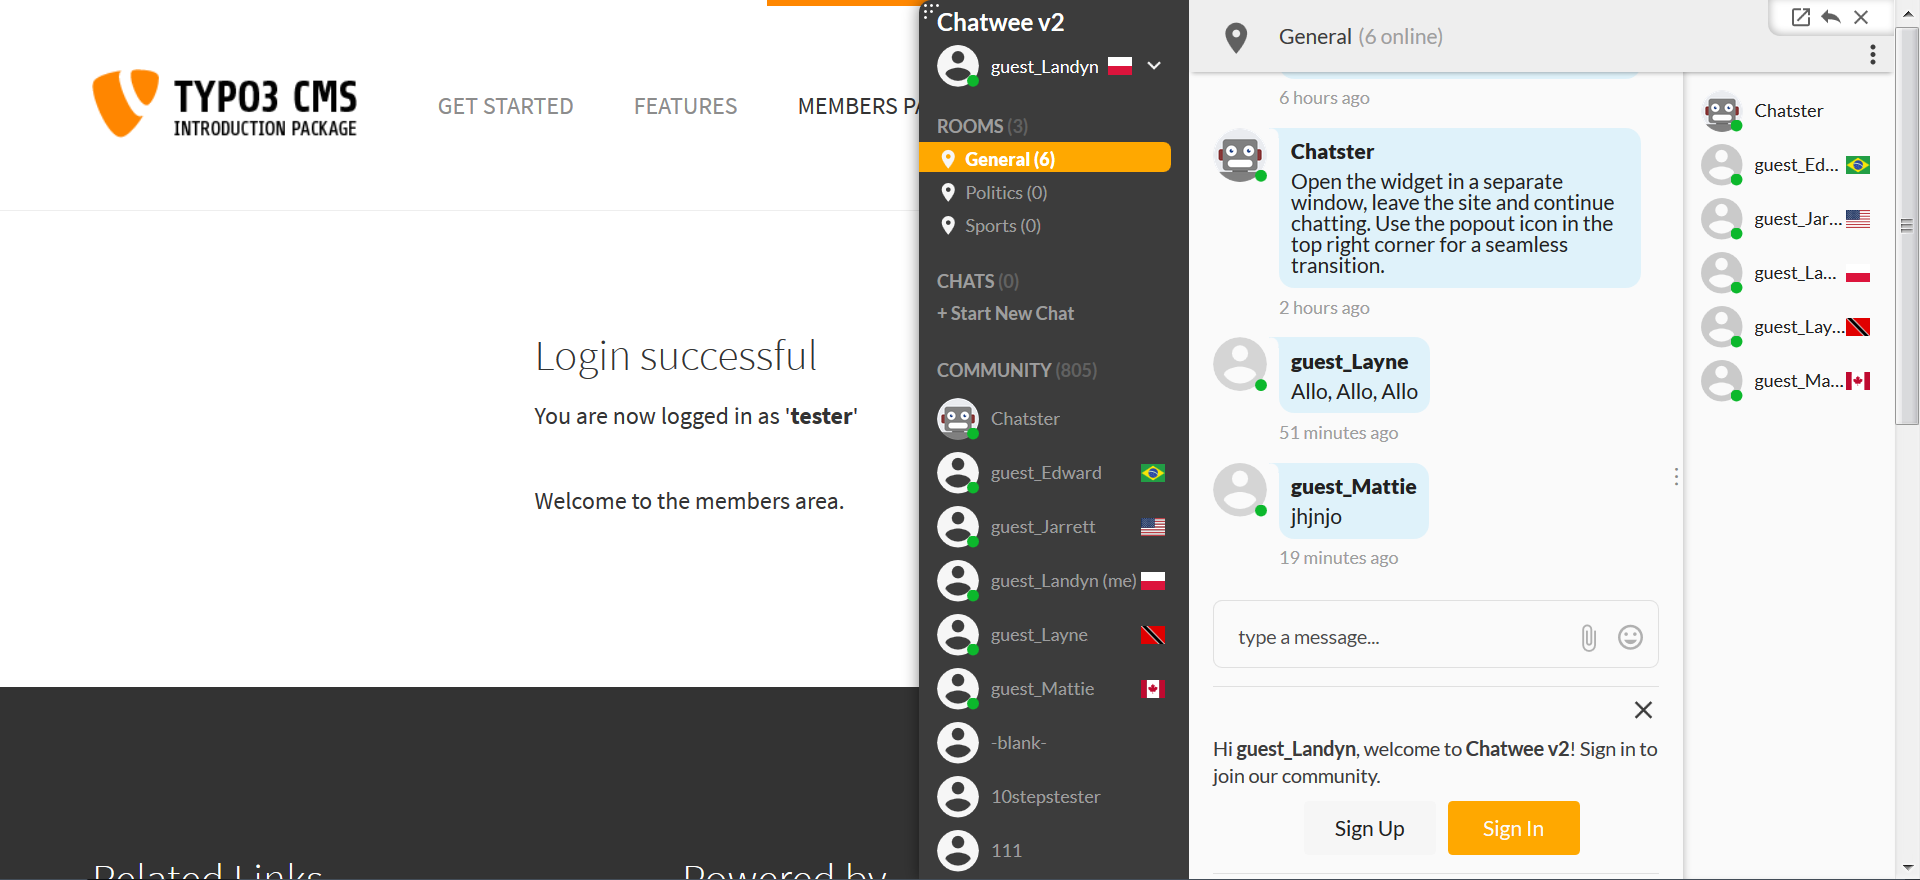
There you have it - a live chat extension to enhance your Typo3 site with a real time interaction feature. Keep it social and let your visitors hold private, group, and public chats, including rich media and emoji.
If you liked our Typo3 chat share it with others!


